Add a Dropdown Menu to a WordPress Site
How to Add Dropdown Menus to (most) WordPress Sites
The easiest way to do this is usually via the “Customizer” at the top of the WordPress site. You will see this option after logging in as a site administrator.
-
Click on Customize at the top of the page

-
Click on “Menus” on the left-hand sidebar
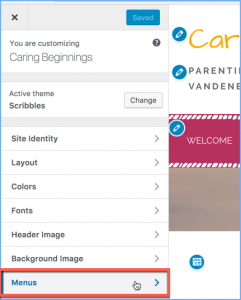
-
Select the menu you want to edit (e.g. the “Primary Menu”)
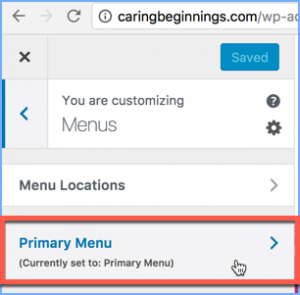
-
In the new sidebar that pops up, scroll until you find the item that you want to add to the menu. Click the “+” sign next to the item
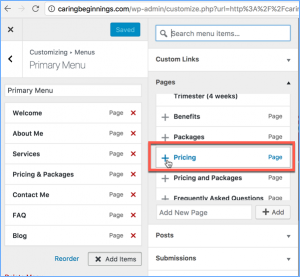
-
Note that the page has been added to the list of menu items on the left
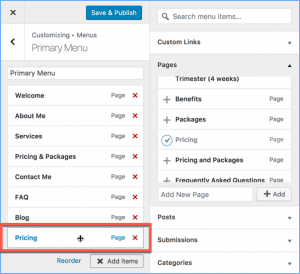
-
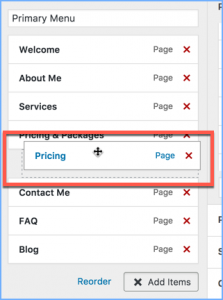
Click and drag the menu item until it is nested beneath the top-level item, from which you wish the drop-down to originate
-
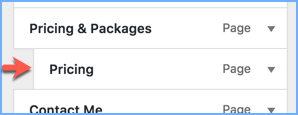
When you are done placing the “child” item, make sure that it is slightly indented from the “parent” item. If it is not indented, then click and drag the child item slightly to the right.
-
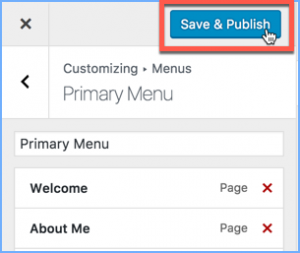
Click “Save and Publish” at the top of the sidebar
Voilà!

Thank you to Monica Vandenberg with Caring Beginnings for asking how to create sub-menus in WordPress, and for allowing us to use her site images in this blog post.
